Summer Project Inspiration

Well, hello there.

I’ve missed you.

Have you missed me? Don’t be coy 😉

If you follow me on Facebook, you would know that I’ve been in a bit of a slump; crafter’s block, if you will.

It’s pretty frustrating to feel uninspired but I’ve somehow been able to keep myself busy with other things (ahem, life). I’ve never been more on top of laundry. Which, I know my family appreciates but it’s my least favorite chore.

In the next few weeks, I plan on shirking my household responsibilities completing several summer wardrobe projects in anticipation for a 5 day trip to Cabo San Lucas, Mexico with the hubs (no kids! Thanks to my bestest friend and *other* soulmate, Hollie, for “volunteering” to keep them!), which, will take place mid-March. This is a work-related trip for him so there will be a few mandatory events that I need to keep in mind when deciding what to pack. Specifically, we will attend a formal Awards Banquet that I’ll need an outfit for and I’d love to DIY it (I’m thinking the sequin maxi below). I wore this to the banquet last year and I felt just a smidge too casual (I also just realized that I never showed you how I made the bodice. shame on me). The event is not really black-tie but it’s full of suits and evening gowns and, in case you haven’t met me, I’m not an evening gown kind of gal. So, I will definitely be going for separates.

I realize it’s still winter but, what better way to kick the gloomy weather blues than by immersing yourself in summer colors and daydreams of the beach?!? Sooo…today’s post is a list of DIY inspiration I’ve found out there in the blogosphere. Perhaps, these projects will motivate you as much as they have me.

Two Harbors Tote

Two Harbors Tote


La Vie En Rose Victoria's Secret Inspired Beach Cover-up

La Vie En Rose Victoria’s Secret Inspired Beach Cover-up

Prudent Baby Shirt Dress

Prudent Baby Shirt Dress


Cotton and Curls Tulip Wrap Skirt

Cotton and Curls Tulip Wrap Skirt


A Pair and a Spare Sequin Maxi Wrap Skirt

A Pair and a Spare Sequin Maxi Wrap Skirt


Sincerely Kinsey Urban Outfitters Inspired Lace Shorts

Sincerely Kinsey Urban Outfitters Inspired Lace Shorts

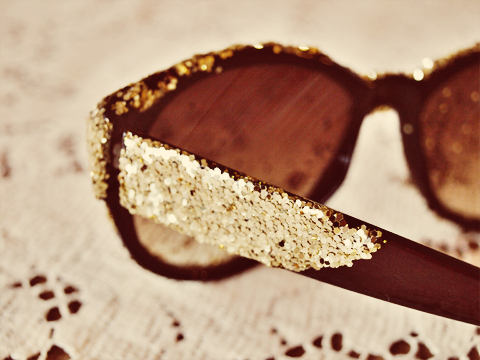
She is Red Glittered Sunnies

She is Red Glittered Sunnies


Manzanita Flip Flop Refahion

Manzanita Flip Flop Refahion


What I Wore Striped Summer Hat

What I Wore Striped Summer Hat


What do you think of these projects? I hope you’ve been inspired to start some summer projects of your own. If you do, please share them!

I’m off to walk the lake trail with the little one since we finally have some sunshine! I love Thursdays and I am so greatful to have nice weather today. Hey, that reminds me, I heard an interesting statistic the other day (not sure from where) that said that most women are happiest on Thursday. That was speculated to be a result of anicipation for the coming weekend but also attributed to the fact that most women have sex on Thursdays more than any other day of the week. I’m not really going anywhere with this except to say enjoy your day!

Blog Signature


Holiday Decorating

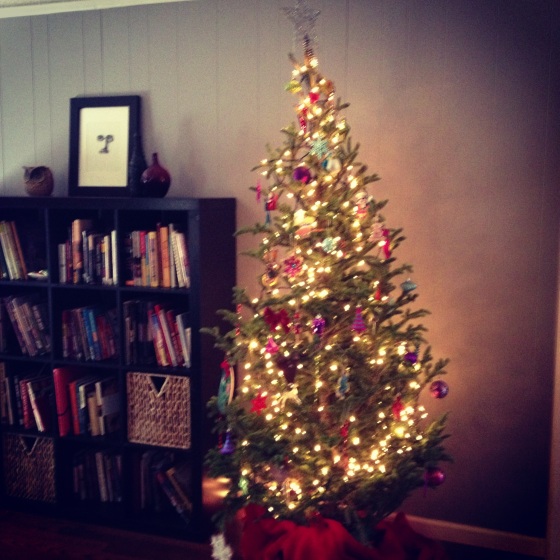
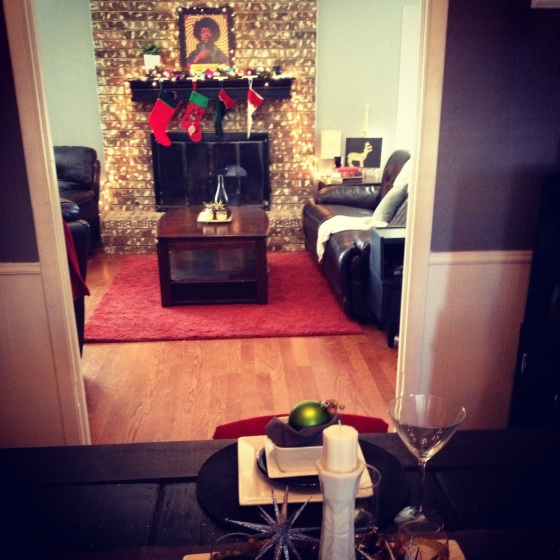
I’m gradually phasing out some of my holiday decorations. I have had the same stuff since I got my own apartment when I was 18…so 10 years. I have been given some things here and there but most of it doesn’t really match. My original stuff is bright colors like purple, turquoise, fuchsia, red and lime green. The majority of Christmas or holiday themed decorations don’t necessarily match those colors so there’s no style or cohesive theme. I have wanted to switch it up for a few years now but wasn’t sure how to start over without breaking the bank (the thought of shopping after Christmas sales gives me the willies).

Going forward I want something a bit more modern but since I do love glitter I’m keeping an element of glam just toned down a bit with neutral colors and elements of nature. I dare say I’ve come up with a new style I like to call Modern Rustic Glam (too much?).

This is just the beginning and I hope to complete some other projects before we go out of town next Friday.

I didn’t take step by step pictures (what’s new?) of the projects I did but I’ll explain for you after the pics. By the way, I did these “instastyle” with my phone because taking pictures with the good camera requires editing which takes too long (for today anyway). I know it’s lazy but I just don’t have time to do it right!

IMG_1242

IMG_1241

IMG_1223

IMG_1218

IMG_1240

IMG_1238

IMG_1239

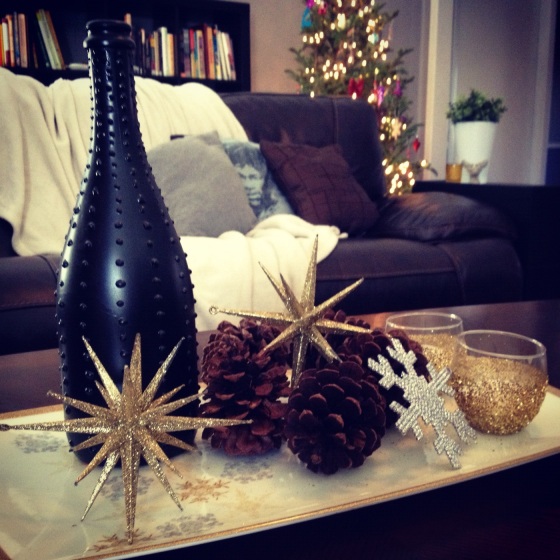
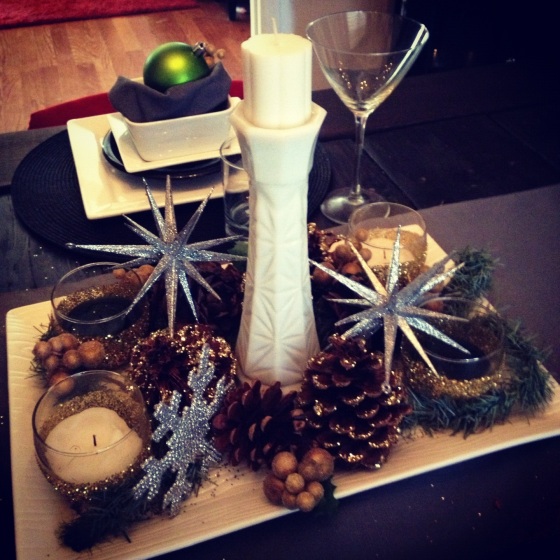
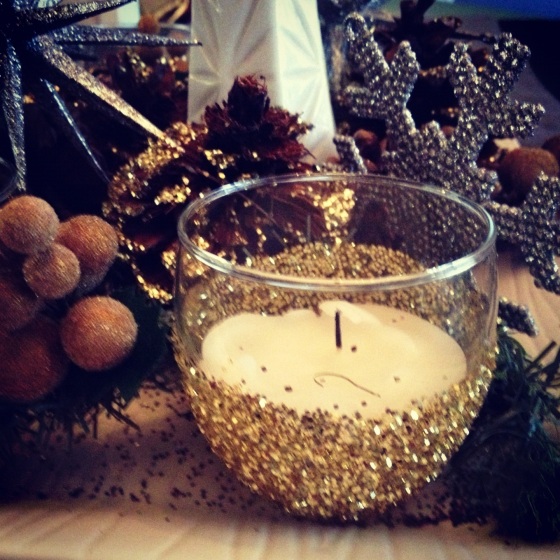
The glittered votive holders are one of the simple and inexpensive projects I completed yesterday. I bought plain glass votive holders from Wal-Mart for 50 cents each and then with ModPodge and glitter I already had on hand I glitzed up the bottom 2/3 of them. VERY easy.

Another super simple project was the pine cones. I bought a $3 bag of plain pine cones from Wal-Mart and with the same glitter and modpodge I brushed the glue onto the tips of a few of them and sprinkled them with glitter.

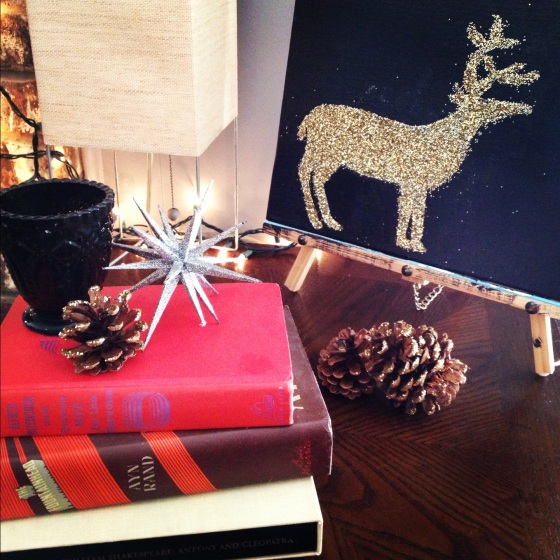
The last project is the glittery reindeer on canvas. I painted a canvas black and then with a cut out reindeer silhouette (I snagged from google images) I modpodged the reindeer onto the canvas (after the paint was dry). I did a coat of mod podge over the whole canvas and let it dry then did just the reindeer and sprinkled on the glitter. Once that is dry you can use a spray sealer to keep your glitter from shedding.

I recommend doing all three of these projects in an airtight disposable room in order to avoid picking glitter off of EVERYTHING IN YOUR HOUSE for the next three years like I’ll be doing…

Tomorrow I’ll show you how I did the curtains in my dining room. Be prepared for amazement at the complexity and high price tag (jk, it’s super easy and cheap as usual!)

Happy Hump day! (sorry, I had to)

Blog Signature

DIY Leather Jewelry

I enjoy making jewelry. I love that I can have exactly what I want pretty much whenever I want it (impatient much?). As long as I can find the materials and the tools to manipulate them I’ll make it happen!

These are very simple and there are almost endless variations by changing materials, shapes, colors, finishes etc. I think that’s fantastic!

DSC_0214


Materials needed:

Scrap leather (or pleather if you choose)

closure (I used a lobster clasp)

metal chain

medium jump rings

leather punch (or, like me, a large embroidery needle, self healing mat and small hammer)

needle nose pliers and wire cutters (or jewelry pliers with the cutting thing)

earring hook things (don’t know what those things are called)

DSC_0271

I didn’t take step by step photos because this is pretty simple stuff.

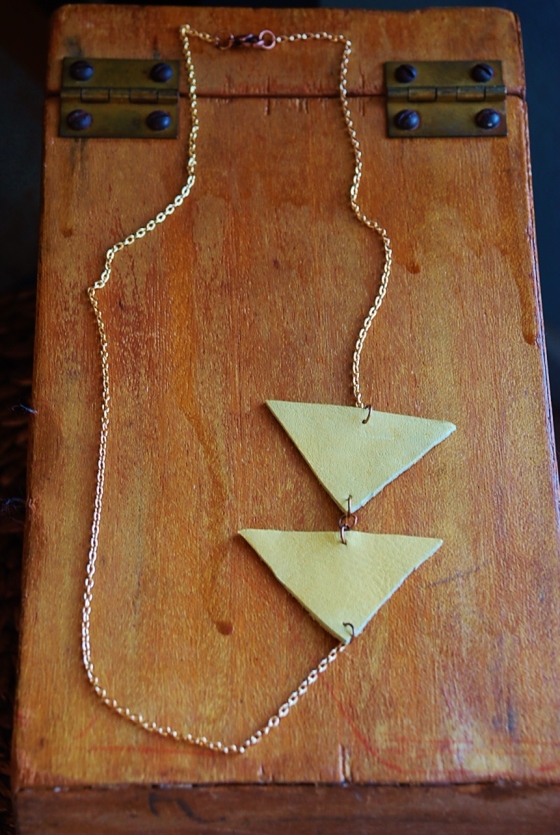
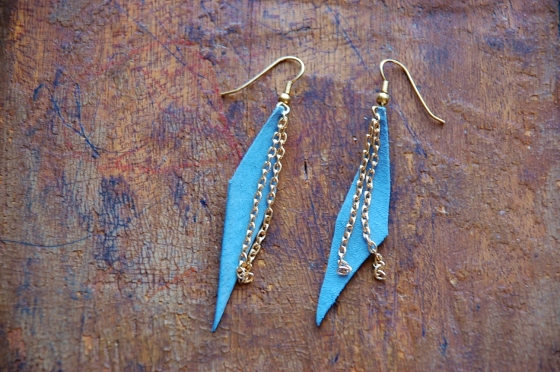
Cut the leather in the shape(s) that you want. I did free-hand because I like the irregularities of handmade things but you could make a pattern by printing out some shapes from your computer.

Make small holes in the leather and insert jump rings where you need them.

For the necklace: just measure out the length you want and cut the chain into two pieces that put your leather piece where you want it. I did mine off center. Attach your clasp with jump rings.

For the earrings: I added a bit of chain and attached it along with the leather to the earring things.

See? Simple.

Just in case you are someone who doesn’t enjoy jewelry making like I do… visit my etsy shop where these items and more are available for purchase. During the month of December, for every $5 in purchases I am donating one item as a gift to women/girls that are victims of human trafficking. To learn more about the organization that handles the donations and the women that receive the gifts please email me!

Blog Signature

Dining Room Make-over Reveal!

This is definitely long overdue.

I had a nice little break with family in from out of town and getting back into the swing of things after the Thanksgiving holiday proved to be more challenging than I had hoped.

Mostly, I have just been putting off taking pictures of everything because, well, it’s not the thing I’m best at and the lighting in my dining room is less than stellar (too many trees) so I knew I would have lots of editing to do. Not the easiest thing to do with a toddler, I’ll admit.

I was sort of waiting until my Christmas gift from my hubby arrived; a shiny new laptop. This way I can edit photos and blog from outside while the little one plays without drowning his laptop in endless photos and software he doesn’t use. I will also be able to blog in the evenings now that I can do so from the comfort of the couch rather than vanquishing myself to the office where it’s cold and lonely 🙂

Windows 8 is going to take some getting used to and, I’m just going to throw this out there, it doesn’t seem to make much sense without a touch screen. Perhaps, I just need more practice…

So ANYWAY here it is!

Well, first, let me remind you how this room looked BEFORE

Maroon Wall

Maroon Wall

Weird Yellow Wainscoting

Weird Yellow Wainscoting

AFTER

DSC_0153

DSC_0156

DSC_0144

DSC_0145

DSC_0146

DSC_0148

DSC_0149

Well, there it is folks! This doesn’t even resemble my original vision but, I think it turned out great. I was able to finish all but two items on my list; a rug and replacement for the chandelier. I’m ok with that! In the next week or so I’ll share with you each of the individual projects that make up the room and hopefully inspire you to tackle some DIY projects of your own.

I’m happy to be typing this on my laptop and I foresee more regular posts from me in our future because of it 🙂

I also have some DIY jewelry that I can’t wait to share!

Until tomorrow!

Blog Signature

Coffee Bar = Best space in the house!

I finally finished it, ya’ll! I can’t stop admiring it and now I wonder how I’ve ever lived without it! If you’re a coffee lover I definitely recommend making a coffee bar in your own home. Even if you have limited space (as I do) it’s likely you can make it work. Mine occupies the smallest corner of the dining room which has otherwise been empty since most functional pieces of furniture would never fit. I had a large-ish palm there for a little while but I think this is such a better use of space!

This project made me feel a bit like Dr. Frankenstein and you’re about to see why. I was never able to find the perfect piece to make-over (one that fit in my budget, that is) so I had to mix and match to get what I wanted.

Here’s what I started out with. Two small (very small) silver cabinets about a foot wide each and 1 and half feet tall for $15. The little shelf I got on a garbage digging excursion (but it’s not part of this project) and the white cabinet was $5.

I took the little feet off the two silver cabinets and busted out the jigsaw. I had to eliminate the overhang of the trim around the top and bottom.

Now, here is where the Frankenstein comes in. Using some scrap plywood I retrieved from someone’s curbside donation pile (better?) I cut a piece in the size of the bottoms of the two cabinets side by side and then glued and screwed them to it. I then used a metal bracket on the back top edge to stabilize the two together and filled the gap with a healthy dose of wood filler.


I basically made a box out of plywood for the two to sit on and then used wood filler again to smooth out the areas where the cabinets attach to the plywood. I also reattached the feet to the bottom and I had to turn around one of the doors since they were originally facing in the same direction.

I sanded and painted it and voila!

The white cabinet I simply used as is and hung it on the wall above. Actually, all of the knobs were shiny silver so I spray painted them to look brushed.

Best little corner of the house!

After all that, a cappuccino was in order 🙂

Like I said, I recommend this for anyone that appreciates a good cup of joe. It would be a much simpler project if you have an old chest or dresser that you could revamp and maybe do some simple open shelving on the wall with hooks to hang your cups. The possibilities are endless!

I am way behind on my checklist for make-over completion and I have only a week to get it done! Here is what I have left (in no particular order)

  • Buffet
  • Window covering
  • Artwork
  • Table extension
  • Chair redos
  • Stool redos (plus I need to find one more)
  • Rug
  • Apron holder
  • New menu board (in progress)
  • Chandelier revamp

YIKES! This is list is frighteningly long! Anyone want to volunteer to help?

The chandy, rug, apron holder and window covering are lower priority but I haven’t given up yet. I still have hope that I can finish all of this so please join me in my fantasy world and try to keep up because I’ll be moving at warp speed this week. Thank goodness my coffee bar is done; I see lots of espresso shots and abnormally large pots of coffee in my immediate future!

Have a fantastic Sunday and GO COWBOYS!

DIY Lamp from Vase

I am in super scramble mode as Thanksgiving is sneaking up on me a bit quicker than I thought it would. My brother and his girlfriend will be here on the 19th so that is my deadline to have my dining room make-over completed. YIKES! With less than two weeks left I have a TON of work to do still but (fingers crossed) I think I can get it done.

While I wait for paint to dry on other projects I decided to tackle a project I’ve wanted to do for a while. It was surprisingly quick and easy! I had heard that you can drill holes into glass using a carbide bit and knew exactly what I was going to do. A few years ago my sister gave me two large sea foam colored glass vases (which she got from Ross more than 5 years ago for $9 each) and I’ve always thought they would make great lamps. In addition to that, I came across some FREE drum style lamp shades that I’ve been dying to make use of. With the help of a carbide drill bit and lamp kit from Lowe’s I am now the proud owner of a self-made $30 lamp…and I love it!

Please excuse the terrible iPhone pics!

I like that it’s a bit worn and it’s transparent enough that you can see the cord a bit but you could always paint it. Spray paint on the outside for a matte finish or use watered down paint on the inside for a glossy look.

I plan on converting the other vase just the same and these two handsome guys will make their new home in my dining room when the new buffet is done (should be ready this weekend!).

Here are the simple steps.

Vase

tape an x in the spot where you want the hole and slowly drill, spritzing with water often to keep everything from over heating. You will need to go MUCH slower than you would if you were just drilling a hole into wood. This is going to take time and patience!

see the hole??

now rinse it out and let it dry THOROUGHLY (the hard part)

follow the directions on the lamp kit and attach your lamp shade!

This vase had a ball shaped lid with cork so I just removed the ball and used the cork as a way to hold the bulb housing in place. You could always just buy a chunk of cork and cut it to size.

Love!

It’s very likely that my coffee bar will be ready for sharing tomorrow (that’s the goal anyway) so stay tuned!

Thrifted Side Table Rehab

Would you believe I paid only $10 for two of these? Yea, my husband couldn’t believe it either…

but, with only a few hours of elbow grease and a couple of dollars worth of sandpaper and paint I now have these beauties in my living room. 😀

I used an inexpensive black satin finish paint on the wood and metallic silver spray paint on the knobs. I love them!

By the way, I am in the (slow) process of making over all of the common areas of our house (kitchen, living, dining, entry) and I’m doing so on an almost non-existent budget. So, stay tuned for more DIY projects and make-over ideas!

For now, I’ll leave you with this.

Sewing Machine Necklace (and a bonus Nowak Stir-fry)

I love to sew.

I also enjoy being able to make something that would otherwise never exist.

Enter, my 20 minute sewing machine necklace.

The inspiration for this came from a similar necklace I saw on Pinterest of a camera.

Buy it here on Etsy: MAKE PIE not war

It’s so adorable but I’m not a camera junkie (although I’m working on that so I can provide some better pictures for you guys). I googled for almost an hour trying to find a sewing machine that resembled it to no avail. When I finally admitted that what I wanted didn’t exist I decided to make one. Easy. Peasy. Right? 🙂

Actually, yes!

Here is what I used

Lobster clasp and jump rings, chain, 20 gauge wire, wire cutters, needle nose pliers, white spray paint, and crude drawing plans

Figure out your shape and draw it on scratch paper. I went with a bit of an older looking machine. Then draw it out in the size you want the necklace to be. I made the starting point where the needle would be and then just fiddled with the wire and pliers until I got it close enough. Then I clipped the wire, twisted it to secure and then did some more fiddling until I had it right. After that, I took it outside and spray painted it. This is not necessary if you have silver or gold wire and like it that way. All I had was copper and I didn’t like the way it looked. I figure if I get tired of the white I can paint it any color I want as many times as I want.

Now on to the bonus: Yummy Stir-fry…Nowak style

This is sort of a collaboration of my husband’s and mine. We received bok choy, broccoli and red bell peppers from the co-op this week so we were inspired to do a stir-fry since we already had all of the other ingredients on hand. We have made similar dishes before with a bit less luck (it always seems something is not quite right) though, we have never even bothered to seek out a recipe (not sure why??). What I’m telling you is that I don’t know if this is how a stir-fry is supposed to be made but this is how we made it and it was yum. I think the key to this one turning out was the little bit of cornstarch added to thicken up the sauce a bit. Bear with me because this has a lot of ingredients. So, here you go.

**Important note: This serves EIGHT. Enough for the four of us to eat a serving and then the rest was mixed together in a foil casserole dish, covered and put in the freezer. This is part of my current undertaking which I’m calling “operation-make-double-of-everything-and-put-half-in-the-freezer-in-order-to-avoid-fast-food-and-expensive-eating-out-during-Jonathan’s-football-season” (currently taking suggestions on a new name).

Supplies:

Wok

Steamer

Sauce Pan

Ingredients:

2 stalks (?) bok choy

3-4 broccoli crowns

1-2 carrots

1 large red bell pepper

1 medium onion (any)

3-5 cloves of garlic depending on size (smaller ones from the inside of the head are stronger so, 3 if they are small and 5 if they are large ones from the outside)

1 chunk of fresh ginger root (2-3 tbsp when minced)

3 boneless skinless chicken breasts

2 cups of dry rice (I use jasmine but you can use any, really)

1 Tbsp toasted sesame oil

1 Tbsp peanut oil

For the sauce:

1/2 cup mirin

3 Tbsp rice vinegar

2 Tbsp soy sauce

1 Tbsp fish sauce

1 Tbsp Worcestershire (sp?)

1 Tbsp chile garlic sauce (this stuff)

1-2 Tbsp honey

1 Tbsp dijon mustard

1/4 cup chicken stock

2-3 Tbsp corn starch

Spice Rub:

2 tsp garlic powder (not garlic salt)

2 tsp onion powder

2 tsp dry mustard

1 tsp chinese 5 spice

1 tsp coriander

1 tsp all spice

1/2 tsp clove

1/2 tsp cinnamon

Garnish:

3 green onion stalks

1 Tbsp black sesame seeds

1 Tbsp white sesame seeds

Ok. Whew! That’s long!

First:

Cut the florets from the broccoli crowns and get them going in the steamer. Then make your rice. For Jasmine it’s one part rice two parts water. Cook the broccoli until its just before tender as it will cook a bit more later.

Next:

Prep your other veggies. I did matchstick-ish cuts on the carrots but you could also just grate them. The pepper got a medium dice. The green onions I sliced on the bias. The big onion sliced in little inch long bits and the garlic and ginger was minced.

Meanwhile, Bo prepared the chicken breast by trimming and cutting it into bite sized pieces then seasoning with salt and pepper to taste and then the spice rub. Place it in a bowl and set aside.

Heat up your wok. Mix together all of the wet sauce ingredients and then whisk the cornstarch in until most of the lumps are gone.

Add the oils to the wok and allow to heat just until it starts to smoke then add the chicken. Cook the chicken through then add the bok choy, carrots, onions and bell pepper. Cook until almost tender then add the ginger and garlic and cook for just another minute or two. Add the broccoli and the sauce and cook just until the sauce begins to thicken. Remove from heat.

Plate with rice on the bottom, spoon the stir-fry over and top with green onions and a sprinkle of sesame seeds.

Eat with chopsticks!

Please reprimand me in the comment section if I left something out or it doesn’t make sense…the little one is tugging at me saying “hold you, mommy. hold you?” so, gotta go!

**UPDATE**

I forgot to mention that you can regrow bok choy from the discarded end piece. Cut about 2 inches from the bottom and place it cut side up in a bowl of shallow water and in a spot that has some natural light. After a couple of days you can plant it in soil with the dirt coming up to just cover the original cut part with the new growth exposed. In a month or two it should be ready to harvest. You can then replant it as you did the first time. It’s an endless cycle!! See my “grow it” page for a list of other veg you can do this with.

Slacks to Skirt Refashion

Like I said yesterday, this is my favorite of the refashions so far and I wore it only for about three hours and got tons of compliments. It was fun to be at such a beautiful event where I know people wear their best and every time someone tells me “You look gorgeous! Love the dress!” I just snicker to myself knowing that I made this 🙂 …from hideous over-sized MC Hammer-like way-too-pleated $2 slacks from Goodwill!

This really could not be more simple. Grab some slacks from a second-hand store (or your dad, grandpa, husband’s closet). Mine were actually women’s pants which is really not necessary. All that matters is that you like the material.

Turn them inside out and fold them in half. Making sure all of the fabric is straight and the legs are lined up. Pull the crotch out so it looks like the picture below. Using a ruler and tailor’s chalk mark a line straight down from just below the end of the zipper to wherever that straight line lands at the edge of the pant leg.

Now measure how long you want your skirt and add an inch then mark with your chalk and ruler.

These are your cut marks. Make sure the cut up near the crotch is as straight as possible.

Now, open it up and fold in half like you’re going to iron a crease. This will give you two open sides which will end up the middle front and middle back seams of the skirt. Pin down these sides and sew together.

IF the pants previously fit in the waist then all you have left to do is hem the bottom.

For me, my pants were not just too big in the waist but they were waaaay to big through the hips (did you see all that pleating?) and thighs.

I also wanted a curvy shape that tapered at the bottom but had plenty of room in the hips. So I just sewed from the top of the waistband down to the bottom in the shape I wanted.

I didn’t get any pictures of this step but I did a little drawing for your amusement (and clarification). Red is the sew line. As you can see, I had to sew the pockets closed, which I’m still not very happy about but, trying to keep them and get this thing to fit properly would have required more time than I had available (I made it at midnight a couple of days before the wedding).

There you have it, folks. In case you were wondering, yes, I made the bodice as well. It wasn’t a refashion but it was made from clearance fabric 🙂 . It’s a bit more complicated as it’s completely fitted with seam shapes I’ve never attempted before but, it turned out as I wanted. One day, I will share with you how I did it.

Also, the earrings, made those too 🙂 tutorial is coming soon.

And for those of you that are interested the bag is vintage (it was my mom’s) and the shoes are my newest obsession. Vera Wang (got em 60% off though!). I got a ton of complements on these too. Can you see why?


Thrifted Blouse to Simple Summer Bag

I’m loving this bag! Oddly, it seems to go well with a lot of things I own. I guess because I tend to go for neutrals but, it’s great because this adds a little lot of color and interest to anything I wear it with. My favorite thing about this bag is that you use the buttons of the shirt to open and close it. It’s not as fast as a zipper or a snap but it’s a cute and unique detail.

I’m proud to say that I snagged this blouse at my favorite thrift store for only $1.50. I wasn’t sure what I would do with it but I loved the colors and couldn’t pass it up at that price.

I didn’t do a lining or pockets because I wanted this to be extremely simple and I didn’t want to stiffen it by adding an extra layer fabric. I like the way it slouches due to the blousy fabric.

Here’s what you need to make one:

Large colorful blouse

Scissors & pins

Sewing matching and thread

  1. Cut off the shirt across the armpits and along the side seams.
  2. Fold in half, side seams meeting and right sides facing in. Pin and sew. I recommend a straight stitch about a 1/4 inch in and then go back and zig zag stitch along the edge to prevent fraying.
  3. Cut a strip of fabric from the back panel of the shirt about 20 inches long and 8 inches wide.
  4. Fold in half lengthwise with right sides facing. Pin and sew along long edge.
  5. Turn strap inside out and gather (pleat) the ends. Sew across pleats to hold in place.
  6. Unbutton and put the ends of the strap at each of the top corners lining up the stitches you just made on the ends of the straps with the point where you will sew up the sides. I twisted my strap for interest.
  7. Line up the corners and sides then pin in place making sure you keep your straps correctly lined up.
  8. Sew along the edges about 1/4 inch in from sides then zig zag stitch to prevent fraying.

That’s it! Easy, huh?

Don’t forget to check back tomorrow for another thrift store find refashion. Tomorrow’s is BY FAR my favorite! I wore it to a wedding last weekend and got a thousand (give or take 😉 )complements!